In this guide, I will be building a Discord bot from scratch using only discord.js and a few open public APIs. I’ll also explain each step and discuss the reason for preference of a particular way of implementation over others. Unlike other “recipes” on the web, this will give you insight into the workflow of building software.
This may seem like a long post because it is. I suggest you to follow along in chunks so you don’t get overwhelmed. The tutorial is divided into chapters. So, let’s get started.
WHAT ARE WE BUILDING?
Mayhem is a simple Discord bot that is aimed for entertainment and fun. It queries external public APIs for images, jokes, facts and definitions. Few commands are meow, cat, whatis, whoami, ls, help, whereami and so on. There is a subtle shoutout to UNIX if you’re familiar ;).
Moreover, these commands are chosen and designed in a way to demonstrate capabilities of the Discord API. Thus, features such as exclusive commands, cooldown periods, pre-fetching etc. are also discussed.
CODE REPOSITORY
The latest version of the codebase can be found here. Instructions for installation on your Discord server can be found in the README.md.
For options to host the bot, see Deployment Options in the README.
JS PRE-REQUISITE CHECK
You should be familiar with JavaScript and computer programming concepts such as loops and conditionals. But JS is a particularly notorious language as it is continuously being modified to suit the industry. You should know at least ES6 or ES7. If not, no worries! Below I cover few JS concepts we’ll be using in this project.
ARROW FUNCTIONS
[1,2,3].map(elem =>
	{ console.log('doubling!');
	 return 2*elem;
});
A syntactic-sugar to reduct clutter. Nothing more but highly convenient for writing chained promises (If you ever found yourself in such a situation that is).
PROMISES
const data = fetch(URI)
	.then(res => res.text())
	.then(tex => JSON.parse(tex))
	.catch(err => console.log(err));
A fix to execute asynchoronous statements synchoronously. Think of these commands as being executed one after the other and not all together because they can’t as the data are dependent on successful execution of previous steps. I never liked it much.
await/async FUNCTIONS
async function nano(args){
	const _r = await fs.readFile('stuff.json');
	// more code
}
Successor to Promises. Cleaner, more logical syntax. As opposed to being an API like Promises, async/await are keywords in JS now.
If you want to gain more insights into these constructs, it is recommended to check out MDN JavaScript module.
INSTALLATION
You need Node.js and a package manager such as npm or yarn. npm comes packaged with Node.
We will be using these npm packages:
discord.js@12.4.1or above (Note: The code is tested with this version only)node-fetch@2.6.1
BASIC SETUP
To make a new node project, run the following in your terminal:
$ mkdir mayhem
$ cd mayhem
$ npm init -y     # -y to say yes to all defaults
$ npm install discordjs@12.4.1 node-fetch@2.6.1
$ touch bot.js
Then, open package.json and add a new script for convenience:
...
 "main": "index.js",
  "scripts": {
    "test": "echo \"Error: no test specified\" && exit 1",
    "start": "node bot.js"
  },
...
CREATE BOT APPLICATION AND GENERATE TOKEN
Now, we have to create a bot application through your Discord account (Make one, we need it!). The steps are as follows:
- Login and open the Discord Developer Portal.
- Click on the “New Application” button.
- Enter a name and click “Create” button to confirm.
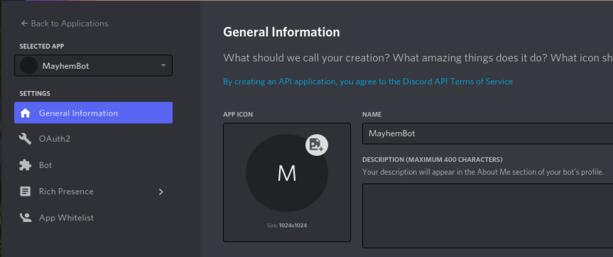
Created New Application in Discord Developer Portal
You are free to edit other information as you wish on this page. We’ll leave it to defaults. Then navigate to the “Bots” tab and click “Add Bot” button.
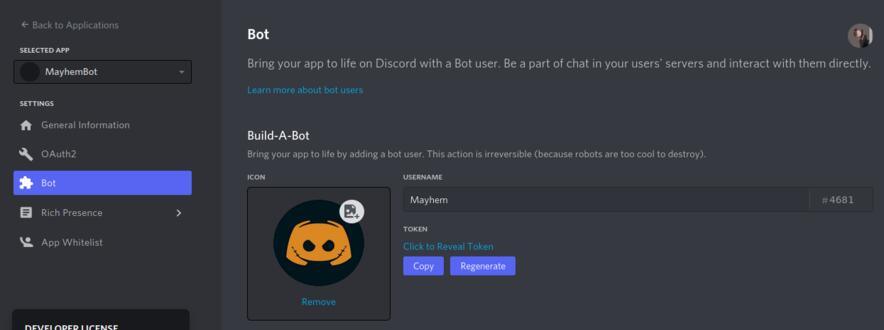
Created new bot and customized with a name and image icon
Clicking on “Reveal Token” will show your bot token. A Token is a unique identifier for your bot application and is used by Discord to authorize your bot to actually log in and appear online in a server.
CAUTION: It is very important that you keep your token safe and secret. You must not mistakenly commit it to a public repo or such. The consequences can be disastrous. If the key got leaked by mistake, immediately click on “Regenerate token” to generate a new token and invalidate all previous tokens.
WARNING: Make sure you copy the “Bot Token” and not the “Client Secret” or the “Client Key” which are on the Applications page.
GENERATE BOT INVITE LINK
Bot invite links explained
A typical invite link looks like this:
https://discord.com/api/oauth2/authorize?client_id=123456789012345678&permissions=0&scope=bot%20applications.commands
The fields that need elaboration are the query parameters which are as follows:
client_id: The client id is the application that is authorized.permissions: an integers which encodes the bot’s permissions on the server in binary.scope=bot: Yes, this is a bot invite link.applications.commands: To enable Discord to allow/(slash) to invoke bot commands.
Head over to the OAuth2 page, scroll down and select applications.commands and bot. Then, choose permissions that you want your bot to have. The page handily generates the link for you.
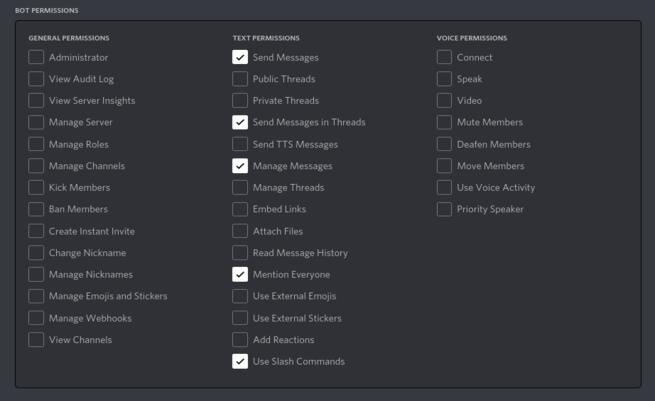
Permissions for Mayhem
Here, I show the permissions for our bot. As you can see, it is a fairly less-demanding bot in terms of administrative privileges.
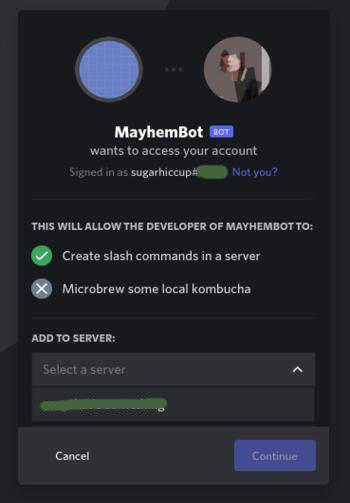
Authorizing your bot into a server
Paste the generated link and you will be asked to authorize the server. Note: You can add them to servers in which you have admin access only. If successful, you’re greeted by a confirmation dialog. Congratulations, now you can see Mayhem online with a “BOT” tag!
CHAPTER 2
In Chapter 1 of this tutorial, we had finished logging our bot into our server. In this post, we plan to give it some interactivity with human users. Moreover, we will organize our code in a modular pattern to facilitate modification and addition of more commands easily.
FIRST COMMAND & bot.js
// New file: /bot.js
const Discord = require('discord.js');
const {prefix, token} = require('./config.json');

const client = new Discord.Client();

client.once('ready', () => {
	console.log('Ready!');
});

client.on('message', (message) => {
	console.log(`[${message.channel.name}] ${message.author.username}: ${message.content}`);

	// Don't interfere when you are not required and don't be dumb enough to reply to your own msgs.
	if(!message.content.startsWith(prefix) || message.author.bot) return;

	const args = message.content.slice(prefix.length).trim().split(/ +/);
	const cmdname = args.shift().toLowerCase();

	try{
		if (cmdname == 'hi') {
			message.channel.send("Hi ${message.author}! I'm Mayhem. Nice to meet you!");
		}
	} catch(err){
		console.error(err);
		message.reply('Oops. There was an error while executing that command.');
	}
});

client.login(token);
The code is fairly straightforward to understand. We import the required modules and secrets. The prefix is a special character you use to invoke commands on this bot for eg: /, ., -- etc. After instantiating an instance of Discord.Client(), we log simple text when bot is ready i.e. the ready event is triggered.
Then, for every message sent to a channel, the 'message' event is triggered which is handled by the function we supply to client.on(...). The code parses the message and sends a hi message to the user for messages of the form <PREFIX>hi. Finally, we login with the bot token we generated before.
// /config.json
{
	"prefix": "YOUR-PREFERRED-BOT-PREFIX",
	"token": 0123456789
}
Run npm start or node bot.js and your bot is online!
For now, the bot doesn’t do much and only sends the ‘hi’ message rather annoyingly.
The code structure as such is not very robust or versatile. We’ll organize it to be modular to facilitate that. The idea is we keep code logic for each command in a seperate file in the /commands directory and load them into the client upon instantiation of the client object. Then, adding a new command will be as clean as adding a new file to this directory.
MODULARIZATION
$ cd /path/to/mayhem
$ mkdir commands
$ cd commands
// New file: /commands/hi.js
const {bot_name} = require('../config.json');
const Discord = require('discord.js');

module.exports = {
	name: 'hi',
	description: 'A nice introduction is the gentleman\'s way.',
	usage: '',
	execute(message, args){
		const embed = new Discord.MessageEmbed()
			.setColor('#00ebc7')
			.setTitle(`Hello! ${message.author.username}`)
			.addFields(
				{name: `${bot_name} bot says...`, value: `Yo! Nice to meet you!`},
			)
			.setTimestamp();

		message.channel.send(embed);
	}
}
As you may notice, we export few other handy metadata apart from the function execute(...) which contains the main logic. We will be adding other fields for unique commands as we need them. This approach was highlighted in discordjs.guide.
Now, make the following changes to bot.js.
// /bot.js
const fs = require('fs');
const Discord = require('discord.js');
const {prefix, token} = require('./config.json');

const client = new Discord.Client();

client.commands = new Discord.Collection();

// will be used later
const cooldowns = new Discord.Collection();

const files = fs.readdirSync('./commands').filter(name => name.endsWith('.js'));

for(const f of files){
	const command = require(`./commands/${f}`);
	// According to Discord API, Discord.Collection is a JS Map Object with more convenience methods
	// Set the record with key as the command name and value as the command itself
	client.commands.set(command.name, command);
}

client.once('ready', () => {
	console.log('Ready!');
});

client.on('message', (message) => {
	console.log(`[${message.channel.name}] ${message.author.username}: ${message.content}`);

	// Don't interfere when you are not required and don't be dumb enough to reply to your own msgs.
	if(!message.content.startsWith(prefix) || message.author.bot) return;

	// basic parsing
	const args = message.content.slice(prefix.length).trim().split(/ +/);
	const cmdname = args.shift().toLowerCase();

	// get the cmd object
	const cmd = client.commands.get(cmdname);
	if(!cmd) {
		return message.channel.send('Oops! No such command ;-;');
	}

	try{
		cmd.execute(message, args);
	}catch(err){
		console.error(err);
		message.reply('Oops. There was an error while executing that command.');
	}
});

client.login(token);
Most of the code is intact. The Discord.Collection() is a wrapper around the JS Map Object with few added convenient methods. We read the /commands directory using fs and set the object using client.commands.set(..., ...). Inside the handler, we parse the incoming message, try to get a command object and execute it. At any stage, if we have an exception, gracefully inform the user.
Run the bot again via npm start. Though, we cannot detect any visible changes, we have refactored the code into much more tangible form. Let me talk about one more thing that I have ignored till now.
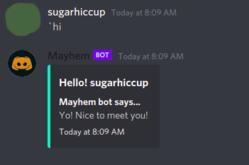
First command of Mayhem
EMBED MESSAGES
Currently, the messages sent by the bot to the channel are simple text messages which are unattractive and less appealing to our users. If you have experience with Discord bots, you maybe aware of colourful, sprawling messages with many fields, formatted texts and images. The Discord.MessageEmbed object in discord.js allows us to construct such messages. If you see the logic of the hi command, we are indeed constructing one.
// /commands/hi.js
...
	execute(message, args){
		const embed = new Discord.MessageEmbed()
			.setColor('#00ebc7')
			.setTitle(`Hello! ${message.author.username}`)
			.addFields(
				{name: `${bot_name} bot says...`, value: `Yo! Nice to meet you!`},
			)
			.setTimestamp();

		message.channel.send(embed);
	}
...
These are all obvious imperative methods that adds a particular field one at a time. For eg: You should deliberate on a color theme because it conveys your bot’s purpose and “vibe” to your users. The setColor() can be used to set a color. setTitle() adds a bold title to the message. The addFields() take up a JSON object and add all key-value pairs to the message body. The setTimestamp(), as expected, adds a timestamp field to the message.
SUMMARY
In summary, we have executed our first command, modularized our codebase and paved the way to breezy development and we know how discord.js handles channel events (via handlers) and about Discord.Collection(), Discord.Client() and Discord.MessageEmbed().
CHAPTER 3
In the last chapter of this guide, we looked at creating our first command, Discord.MessageEmbed(), and modularization. In this part, we’ll demonstrate API fetching and command aliases, while adding two new commands to our bot!
meow & node-fetch
The meow command is a simple command that queries a public API of cat pictures and sends one random, cute cat picture down in the channel. We will use the following endpoint:
https://aws.random/cat/meow
NOTE: If you wish to use an API that requires some kind of authorization, then you have to generate a secret key from a dashboard usually and feed this credential to your .env file (this step is more or less platform-dependent. For eg: replit provides a key-value based secret storage feature). Then, you can read that value via process.env.API_SECRET_KEY or likewise. Consult your API documentation and hosting provider documentation.
But to fetch on the server-side, we have to install a fetch-equivalent module on our server. This is achieved by the node-fetch package.
yarn add node-fetch # or npm install node-fetch
Now, let us implement the meow command.
// New file: /commands/meow.js
const fetch = require('node-fetch');
const {prefix} = require('../config.json');

module.exports = {
	name: 'meow',
	description: 'Coz everyone likes cats!',
	usage: `${prefix}meow`,
	cooldown: 10,
	execute(message, args){
		const file = fetch('https://aws.random.cat/meow')
			.then(file => file.text())
			.catch(err => {
				console.error(err);
				message.channel.send(`An Error was encountered while executing that command.`);
			});
		message.channel.send(JSON.parse(file).file);

	}
}
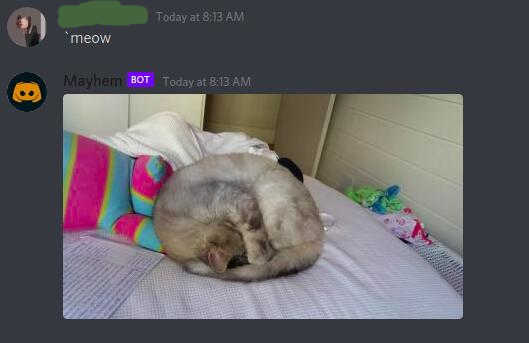
The meow command
Once again, the code is obvious and there is no element that requires an explanation as such. The “cooldown” parameter will be dealt with in another command. But, you can probably guess it is to prevent a indirect DDoS attack on the cat server by bad actors and/or bots.
help
Good UI/UX don’t require a manual to be used. So, like every good software, we will provide a handy help command for potentially new users of our bot. This command will demonstrate sending personal direct messages and command aliases.
The design of the messages is decoupled from the logic. Feel free to make your bot as snazzy as possible.
// New file: /commands/help.js
const {prefix, version,bot_name, bot_author} = require('../config.json');
const Discord = require('discord.js');

module.exports = {
	name: 'help',
	description: 'Display all available commands',
	aliases: ['h','?'],
	execute(message, args){
		const data = [];
		const {commands} = message.client;

		if(!args.length){
			// show all commands
			data.push(`This is the ${bot_name} Bot version ${version}`);
			data.push(commands.map(command => command.name).join(', '));
			data.push(`Use ${prefix}help [command name] to get details about [command name]`);
			data.push(`All commands are prefixed by the ${prefix}`);
			data.push(`\n\nSend your love to ${bot_author} ;)`);

			// split: true splits the message into separate messages if char count > 2000
			return message.author.send(data, {split: true})
				.then(() => {	// DM as help message can get messy
					if(message.channel.type === 'dm') return;
					message.reply('I\'ve sent you a DM');
				})
				.catch(error => {  // the case when user has DM disabled must be gracefully handled
					console.error(`Could not send help DM to ${message.author.tag}.\n`,error);
					message.reply('I can\'t DM you. Do you have DMs disabled?');
				});
		}else{
      ...
As you can see, message.author.send(...) is used to send a message to the original message author’s DM. If a bare help is invoked, we inform the user of our commands personally and ask them to explore more by using the format help [command name].
Once again, the aliases field will come handy in the next part of this function.
...
	}else{
			const name = args[0].toLowerCase();

      // try to make a hit, either the command or its aliases
			const command = commands.get(name) || commands.find(c => c.aliases && c.aliases.includes(name));

			if(!command){
				return message.reply('Not a valid command -_-');
			}

			const embed = new Discord.MessageEmbed()
			.setTitle(`Help for ${command.name}`)
			.setColor('#02fede')
			.addFields(
				{name: 'Aliases', value: (command.aliases) ? `${command.aliases.join(', ')}`: 'There are no aliases for this command!'},
				{name: 'Description', value: (command.description) ? `${command.description}`: 'Currently no description available!'},
				{name: 'Usage', value: (command.usage) ? `${command.usage}`:'Currently no usage available!'},
				{name: 'Cooldown', value: (command.cooldown) ? `${command.cooldown} second(s)`: 'This command has no cooldown!'}
			)
			.setTimestamp();

			message.channel.send(embed);
		}
	}
}
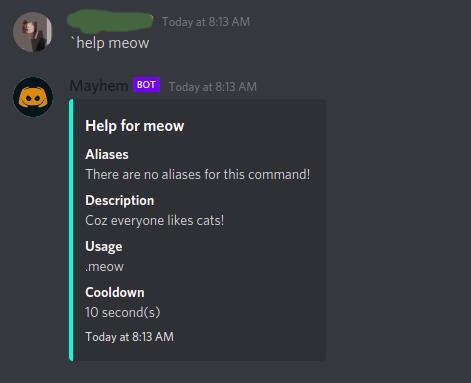
help meow command execution
You can probably understand the workflow that discord.js promulgates. Here it is:
PARSE :right_arrow: EXECUTE :right_arrow: SEND
SUMMARY
In this post, we finally made an API call from our bot and served some cute cat pictures to our users. Now, the sky’s the limit for you! Moreover, we added a help command to be more organized.
CHAPTER 4
In the last part of this guide, we implemented the meow and help commands. Now, we will look at leveraging the API exposed by discord.js to implement cat, whatis, and rm commands.
cat & PRE-FETCHING
The cat command makes a query to another free API and displays interesting cat facts to our users. However, the API has only one endpoint and due to performance reasons, we cannot query the entire database each time a user makes request. So, the idea is to fetch the resource at startup time of the boot and save the data locally on the disk. This, though makes our bot more efficient and performant, has obvious disadvantages: What if the data on the API server mutates? But, we shall ignore such concerns as it is basically a database API.
Fire up your text editor and create this new file: fetcher.js.
# New file: /fetcher.js
const fs = require('fs');
const fetch = require('node-fetch');
const {CAT_API_KEY} = require('./config.json');

async function writeData(){
	const data = await fetch("https://brianiswu-cat-facts-v1.p.rapidapi.com/facts",
		{
			"method": "GET",
			"headers": {
				"x-rapidapi-key": CAT_API_KEY,
				"x-rapidapi-host": "brianiswu-cat-facts-v1.p.rapidapi.com"
				   }
		})
		.then(response => response.text())
		.then(test_response => JSON.parse(test_response))
		.catch(error => {
			console.log(error);
		});

	let raw_data = JSON.stringify(data, null, 2);
	console.log(raw_data);
	fs.writeFileSync('./static/data/cat_data.json', raw_data);

	console.log('written.');
}
writeData();
To get your API Key, go here and follow the steps and put the key in your config.json likewise.
// FILE: /config.json
{
  "CAT_API_KEY": "kjsalkjwRlkjVNLKKJASHLl2l49SF2qlkjS",
}
The steps are obvious. We request the cat server with a /GET request and fetch all the data. If succeeded, parse and write that to a JSON file on the disk using fs.writeFileSync(). For convenience, we can update the yarn scripts to run this file before running bot.js on yarn start.
// FILE: /package.json
...
  "start": "node fetcher.js && node bot.js",
...
Now, we will add a new command cat to /commands. The basic structure remains the same. We export a JSON object with a execute(...) function and few other metadata.
// NEW FILE: /commands/cat.js
const Discord = require('discord.js');
const fs = require('fs');
const {prefix} = require('../config.json');

module.exports = {
	name: 'cat',
	description: 'An enlightening piece of cat fact that will change your life.',
	usage: `${prefix}cat`,
	cooldown: 5,
	async execute(message, args){
		let data_file_name = '\\cat_data.json';
		let data = JSON.parse(fs.readFileSync(__dirname + data_file_name));

    // choose a random cat fact from data
		let index = Math.floor(Math.random() * data.all.length);
		const factText = data.all[index].text;
		const upVotes = parseInt(data.all[index].upvotes);

		const payload = new Discord.MessageEmbed()
		.setTitle('Who wants a cat fact?')
		.setColor('#ffa500')
		.addFields(
			{name: 'Fact', value: factText},
			{name: '\u200b', value: '\u200b'},
			{name: 'Upvotes', value: upVotes}
		)
		.setTimestamp();

		message.channel.send(payload);

	}
}
Restart your app and test your new command!
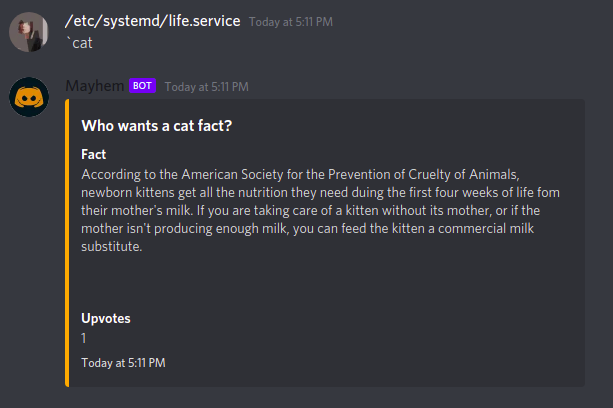
Testing the cat command
whatis & COOLDOWNS
Urban Dictionary provides a free API to query its database. Furthermore, there is no need to generate a key or authorization token. We will be using this API to give our bot a sarcastic nature (you’ll soon see what I mean :winking_face:). The overall pattern remains the same. We construct the request using the querystring package. Just do yarn add querystring. The rest of the execute function handles exceptions such as zero-element list, network error during fetching, etc. Here is the code:
// NEW FILE: /commands/whatis.js

const querystring = require('querystring');
const fetch = require('node-fetch');
const Discord = require('discord.js');
const {prefix} = require('../config.json');

module.exports = {
	name: 'whatis',
	description: 'Your own dictionary utility on Discord.\n\nNo googling or changing tabs :)',
	cooldown: 10,
	usage: `${prefix}whatis <search-term>`,
	aliases: ['def','define'],
	async execute(message, args){
		if(!args.length){
			message.reply(`fatal! You need to specify a search term.`);
			return;
		}

    // See: https://www.npmjs.com/package/query-string
		const query = querystring.stringify({term: args.join(' ')});

    // helper function to trim message to sizable chunks
		const trim = (str, max) => ((str.length > max) ? `${str.slice(0, max-3)}...`: str);

		const {list} = await fetch(`https://api.urbandictionary.com/v0/define?${query}`)
			.then(response => response.text())
			.then(textres => JSON.parse(textres))
			.catch(err => {
				console.error(err);
				message.channel.send(`An Error was encountered while executing that command!`);
			});

		if(!list.length){
			message.channel.send(`No results found for "${args.join(' ')}"`);
			return;
		}

		// just the first element
    // See: Array Destructuring
		const [answer] = list;

		const embed = new Discord.MessageEmbed()
			.setColor('#EFFF00')
			.setTitle(answer.word)
			.setURL(answer.permalink)
			.addFields(
				{name: 'Description', value: (answer.definition) ? trim(answer.definition, 1024): 'No description available!' },
				{name: 'Example', value: (answer.example) ? trim(answer.example, 1024) : 'No example available' },
				{name: 'Rating', value: (answer.thumbs_up && answer.thumbs_down) ?`${answer.thumbs_up} thumps up. ${answer.thumbs_down} thumbs down`: 'No rating available' }
			);

		message.channel.send(embed);
	}
}
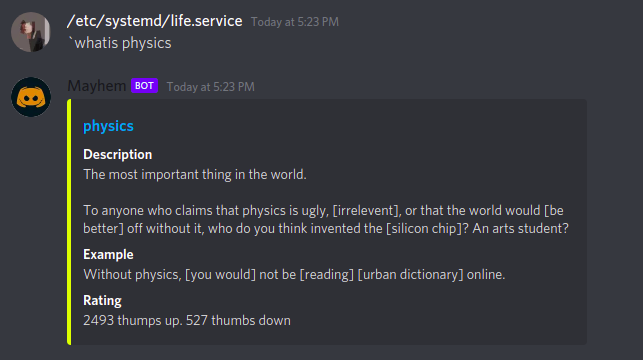
Testing the whatis command. Aliases include: def and define
Cooldowns
You may have noticed the cooldown field. (In fact, it was introduced much earlier but I asked you to ignore it back then). Here, we will use it to add cooldown to our commands. As it is obvious, Indirect DDoS on external servers by repeatedly executing this command is obvious so we must prevent that for susceptible commands such as this.
Update your bot.js with the following code:
// FILE: /bot.js

...
  // use command.usage to improve UI/UX
	if(cmd.args && !args.length){
		let reply = 'You must provide arguments for this command';

		if(cmd.usage){
			reply += `\nThe correct usage of this command is:\n${prefix}${cmd.name} ${cmd.usage}`;
		}
		message.channel.send(reply);
		return;
	}

  // cooldown
	if(cmd.cooldown){
    // keep track of recent commands in cooldown period
		if(!cooldowns.has(cmd.name)){
			cooldowns.set(cmd.name, new Discord.Collection());
		}

		const now = Date.now();
		const timestamps = cooldowns.get(cmd.name);
		const cdtime = (cmd.cooldown) * 1000;

		if(timestamps.has(message.author.id)){
			const expirationDate = timestamps.get(message.author.id) + cdtime;

      // calculate how much time to wait
			if(now < expirationDate){
				const timeLeft = (expirationDate - now) / 1000;
				return message.reply(`You have to wait ${timeLeft.toFixed(1)} more second(s) to use the ${cmd.name} command`);
			}
		}

		timestamps.set(message.author.id, now);
    // clear timeout
		setTimeout(() => timestamps.delete(message.author.id), cdtime);
	}
...
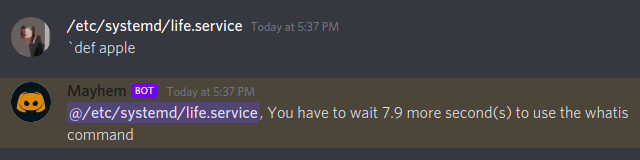
Testing cooldown for whatis command
rm & EXCLUSIVE COMMANDS
Finally, I will show you how to implement exclusive commands using basic Discord ID and some workarounds.
We will write the rm command which (obviously) deletes messages from the channel. It expects an integer argument.
Each Discord user has a UserID. We will allow the command to succeed if the message author is authorized to use the command, else it will result in a failure.
// NEW FILE: /commands/rm.js
const {prefix} = require("../config.json");

module.exports = {
	name: 'rm',
	description: 'Prunes that many messages from current channel. (Reserved)',
	args: true,
	usage: `${prefix}rm <number>`,
	cooldown: 5,
	aliases: ['remove','prune','del','clear','cls'],
	permissions: [ '<AUTHORIZED_USER_ID>' ],
	execute(message, args){
		const count = parseInt(args[0]);

		if(isNaN(count)){
			message.reply(`${args[0]}: That doesn't look like a number to me`);
		}
		else{
			// +1 to also delete the delete command
			message.channel.bulkDelete(count + 1, true).catch(err => {
				console.log(err);
				message.channel.send('Sorry, there was a problem encountered while pruning this channel');
			});
		}
	}
}
Finally, add a check in bot.js to use the permissions array.
// FILE: /bot.js
// permissions
// Uses the message.author.id to determine if author has privileges to use this command
	if(cmd.permissions){
		if(!(cmd.permissions[0] === message.author.id)){
				message.channel.send(`fatal: you can't use this command.\nDo you have enough privileges?`);
				return;
		}
	}
Phew, that has been a lot of concepts and coding! I hope you learnt something interesting and more importantly, got motivated to try out ideas of your own. Below are few commands that I added to my bot. None of them require any special explanation so I have only provided the code. You can also check this in the bot’s Github repo.
ls | LIST ALL COMMANDS
// NEW FILE: /commands/ls.js
const {version, bot_name, bot_author, prefix} = require('../config.json');
const Discord = require('discord.js');
		const data = [];
		const {commands} = message.client;

		if(!args.length){
			const embed = new Discord.MessageEmbed()
			.setTitle(`This is the ${bot_name} Bot version ${version}`)
			.setColor('#fa5246')
			.addFields({name: 'Commands available', value: commands.map(command => '\t\t'+command.name).join('\n')})
			.setTimestamp();

			return message.channel.send(embed);
		}
		else {
			return message.channel.send(`ls doesn't support arguments now`);
		}
	}
}
whereami | BASIC INFO (practically useless)
// NEW FILE: /commands/whereami.js
const Discord = require('discord.js');

module.exports = {
	name: 'whereami',
	description: 'Tells you where you currently are. Immensely useful after a booze party ;)',
	usage: '',
	execute(message, args){

		const embed = new Discord.MessageEmbed()
		.setTitle('Where are you?')
		.setColor('#ff5470')
		.addFields(
			{name: `Channel name`,value: `${message.channel.name}`},
			{name: `Server name`, value: `${message.guild.name}`}
		)
		.setTimestamp();

		message.channel.send(embed);
	}
}
whoami | BASIC INFO (practically useless)
// NEW FILE: /commands/whoami.js
const Discord = require('discord.js');

module.exports = {
	name: 'whoami',
	description: '...Well, if it was a particularly cool booze party (For context: see whereami)',
	usage: '',
	execute(message, args){
		// message.channel.send(`Your username is: ${message.author.username}\nYour ID: ${message.author.id}`);

		const embed = new Discord.MessageEmbed()
		.setTitle('Who are you?')
		.setColor('#ff5470')
		.addFields(
			{name: `Your username`,value: `${message.author.username}`},
			{name: `Your ID`, value: `${message.author.id}`}
		)
		.setTimestamp();

		message.channel.send(embed);
	}
}
FURTHER DEVELOPMENT IDEAS
One can, in principle, go on and on, adding commands and polishing their bot but we have to stop somewhere. I think this will be a suitable time for me to stop. I built this Discord bot and thought it would be fun sharing the learning / building process. It suffices to say the bot is anything from “complete” or “presentable”. Here are few ideas that you can explore:
- Use
dotenvpackage to hide API keys in.envinstead ofconfig.json. - Implement an add/delete command to modify permissions.
- Implement a modifier command to control cooldowns.
- Explore Sockets (persistant TCP connections as in music bots, etc).
- Polish the user interface.
- Use better APIs.
- Use a database somewhere in a creative manner.
DEPLOYMENT OPTIONS
Initially, I hosted the bot on heroku free tier and configured a ping to keep the instance alive but heroku stopped that so I had to find a solution quickly. replit is an innovative and exicting platform for young creators and developers. It is a delight to work in a repl, they have group programming, an in-house database, and so much more. Most importantly, they allow their instances to be pinged so my bot is basically online since a year with as little downtime as ~1 day! If you are passionate about your bot and want more power, consider joining their Hacker plan.
You can program directly in the replit web UI or connect a Github repo and import your code from there.
ACKNOWLEDGEMENTS
This is my first tech guide / tutorial on the web. What things worked for you? What did you not like? I would like to hear from you!
For the development of Mayhem, I heavily relied upon discordjs.guide, a well-explained document and the official Discord API docs.
Basil | @itbwtsh
Tech, Science, Design, Economics, Finance, and Books.
Basil blogs about complex topics in simple words.
This blog is his passion project.